首先来看一下启动服务的两种方式 startService 和 bindService:
startService
StartService(Intent intent)
start 的方式只能简单的开启服务,并且开启之后基本不能干预服务的运行逻辑,话句话说,开启后服务就和开启服务的线程没什么关系了。但是通常我们都是更加紧密的去联系服务,可能会获取一些运行的结果,比如执行结果,进度信息等,那就需要使用 bind 的方式开启服务了。
bindService
1 | bindService 的方法就比较丰富,其传入参数有三个,类型分别为 |
虽然 BindService 参数丰富,功能强大,但是其使用逻辑也略微复杂,下面慢慢道来。
1. 采用 bind 的方法绑定开启服务
a > 先 new 一个类实现ServiceConnection接口,这个类用于为 bind 方法的第二个是参数做准备,我的理解是定义与服务的连接通道。
1 | private class MyConn implements ServiceConnection{ |
b > 实例化出通道,然后使用执行 bind 方法。
在外部声明类:1
private MyConn comm;
调用内部方法:1
2comm=new MyConn();
bindService(intent,comm, Context.BIND_AUTO_CREATE);
其中 Context.BIND_AUTO_CREATE代 代表若服务不存在实例则创建一个实例。
2. 服务内部实现一个代理人类
这个代理继承自 Ibinder,也就是上文 ServiceConnection 中的 onServiceConnected 方法的一个返回值,这个 Ibinder 对象就是服务中的代理在服务外部的一个引用,通过这个引用就可以调用 Ibinder 实现的接口中的方法。
1 | private class Mybinder extends Binder implements IService{ |
3. 定义 IService 的接口
这个接口就是上文提到的 IService 接口,这个接口中通常定义想要暴露给外部的方法,外部也只能看到 IBinder 中实现的这个接口的方法,除非你将上一节中的 MyBinder 这个类定义为Public。
1 | public interface IService { |
4. 返回代理人对象
具体服务是如何将 IBinder 的引用返回给外部呢,就是通过 Service 唯一的必须实现的方法:
1 |
|
5. 实现 serviceConnection 接口里面的方法
现在你就可以在通道中看到 Service 的代理对象了:
1 | private class MyConn implements ServiceConnection{ |
6. 调用接口里面的方法
通过 MyBinder 这个 Service 的代理对象,就可以执行服务中对外开放的方法了。当然这个方法就需要你自己去定义了。
mybinder.callInService();
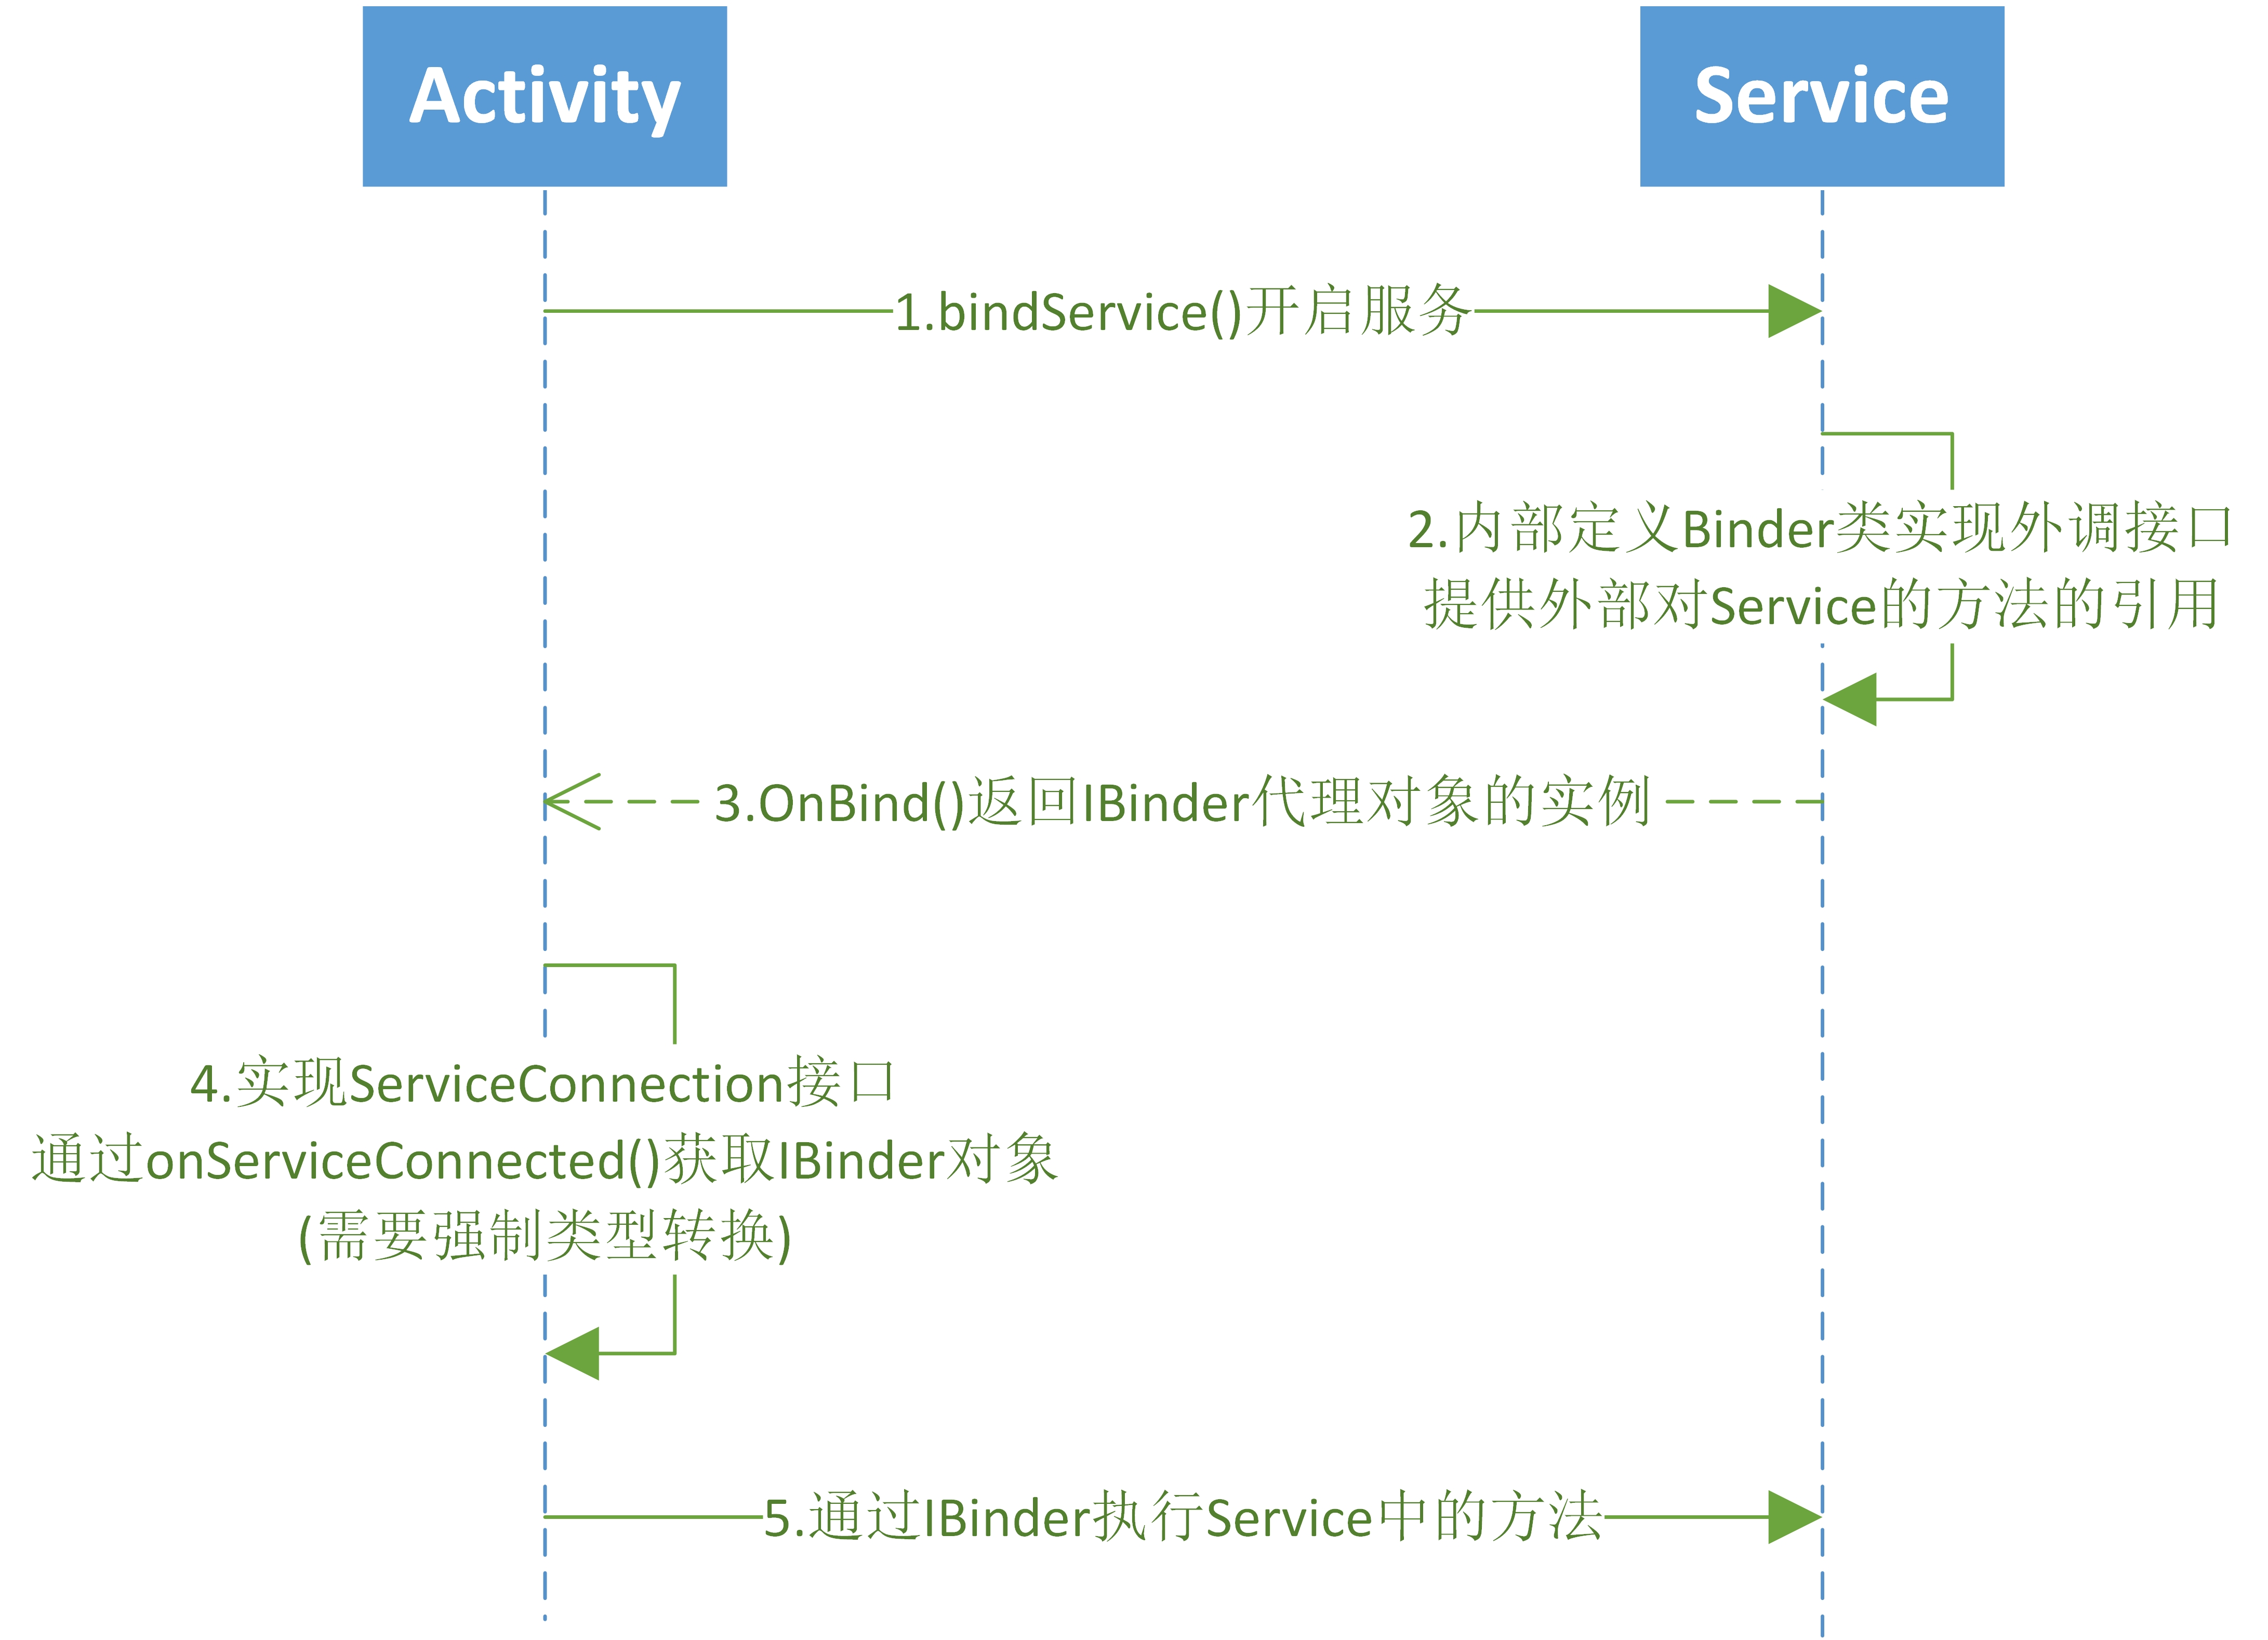
可能看完你还会有点晕,因为文章的书写顺序与代码的实际书写顺序可能并不相同,那么附上一张执行逻辑流程图,你肯定就明白了。
最后的最后,大致说明一下两种方式开启服务的特点
startService
- 生命周期
onCreate()--->onStartCommand()--->onStart()--->onDestroy() - 可以多次调用,不会重复创建,onCreate()只会执行一次
- 以 start 方式开启的服务也只能停止一次,多次调用
stopService()是无效的 - 以 start 方式开启的服务与UI线程失去连系,即使UI线程被销毁,服务仍然可以正常运行
- 不能调用服务中的方法
bindService
- 生命周期
onCreate() --->onBind() -->onUnbind()---->onDestry(); - 只能成功绑定和解绑一次
- 与绑定的UI线程同时被销毁(一根绳上的蚂蚱^_^)
- 可以调用服务中的方法
混合开启服务
既然start开启的服务不能调用方法,bind 方式开启的服务生命力又很弱,那么能否结合使用两种方式的优点么?答案当然是肯定的,否则服务的应用能力就太弱了。
- 通过startService()方式开启服务(只能通过调用stopService停止)
- 通过bindService()进行绑定,以进行服务的方法调用(当需要的时候)
- 通过unBindService()进行解绑(不需要调用方法了,在UI线程被销毁之前解绑)
- 通过stopService()停止服务
这样我们就可以灵活的使用 Service,当需要的时候可以随时进行调用,不要的时候又可以长期运行于后台而不用保留UI线程。这也是服务最常见的用法。